After years of troubleshooting and experimentation, I finally found a working configuration to set up an IPsec VPN tunnel between a FortiGate firewall (configured as a dial-up server) and MikroTik routers (configured as spokes).
This guide walks through each step needed to establish the tunnel using FortiOS and RouterOS.
Routing is not included in this version of the guide but will be added in a future update.
Network Overview
- FortiGate WAN IP: Public or Dynamic DNS
- FortiGate Internal Network: 172.x.x.0/24
- MikroTik Internal Network: 10.x.x.0/24
- VPN Type: Site-to-Site IPsec (IKEv1)
- Authentication: Pre-shared key (PSK)
- Mode: Aggressive
- Encryption: AES-256 / SHA-512
Step 1: FortiGate Configuration (Dial-Up Hub)
1.1 Create the IPsec VPN Tunnel
- Go to VPN > IPsec Tunnels > Create New > Custom.
- Set the following:
- Remote Gateway: Dialup User
- Interface: WAN
- Mode: Aggressive
- Authentication Method: Pre-shared Key
- Peer Options: Accept any peer ID
- IKE Version: IKEv1
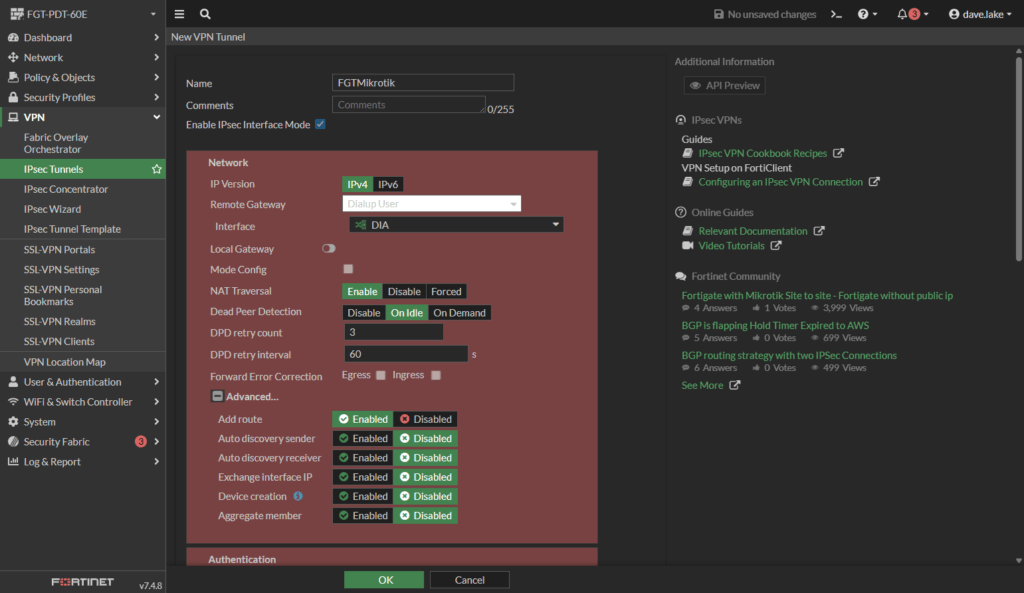
- Encryption settings (This is very important as it must be mirrored on the other side to work):
- Authentication: SHA512
- Encryption: AES256
- DH Group: Enable only Group 21 (uncheck 14 and 5)
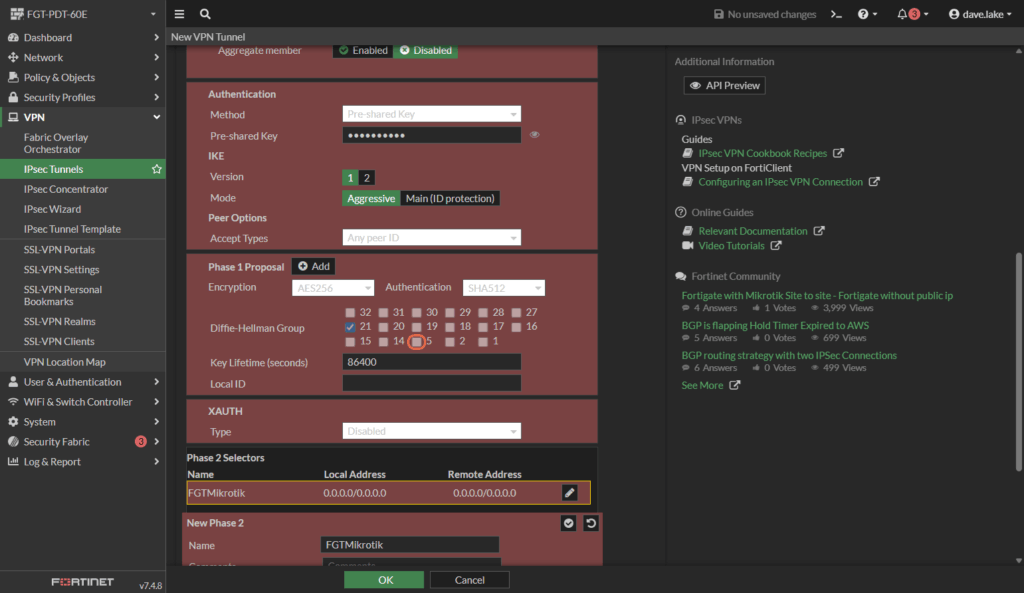
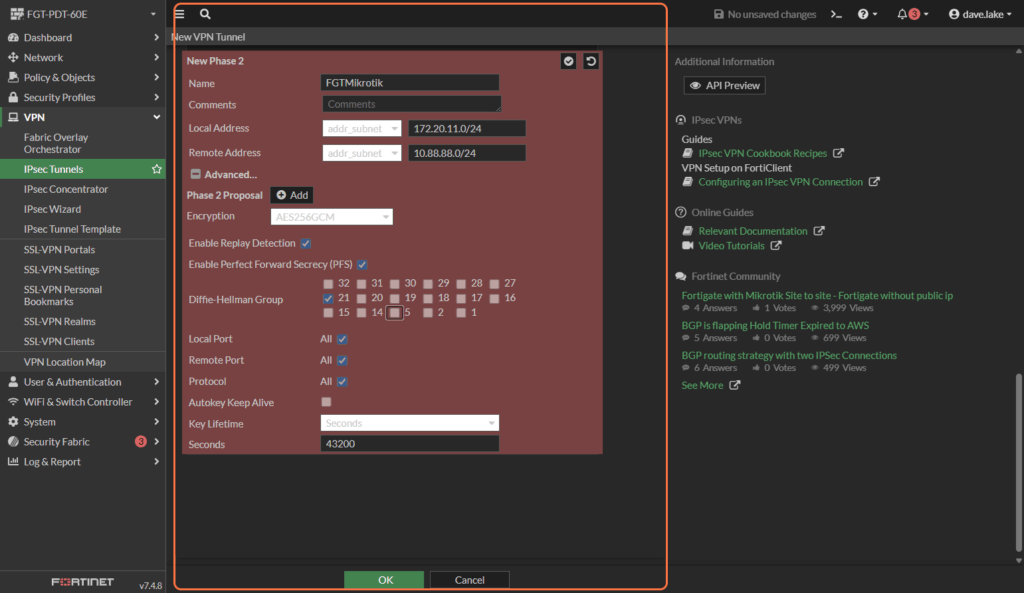
1.2 Define Phase 2 (Quick Mode Selectors)
- Local Address: 172.x.x.0/24
- Remote Address: 10.x.x..0/24
- Encryption: AES256
- Authentication: SHA512
- PFS: Group 21
1.3 Save and Confirm
Save the tunnel configuration and ensure VPN policies allow traffic between internal and VPN networks.
Step 2: MikroTik Configuration (Spoke)
2.1 Log In to MikroTik
Open your browser or Winbox and log in to the MikroTik router.
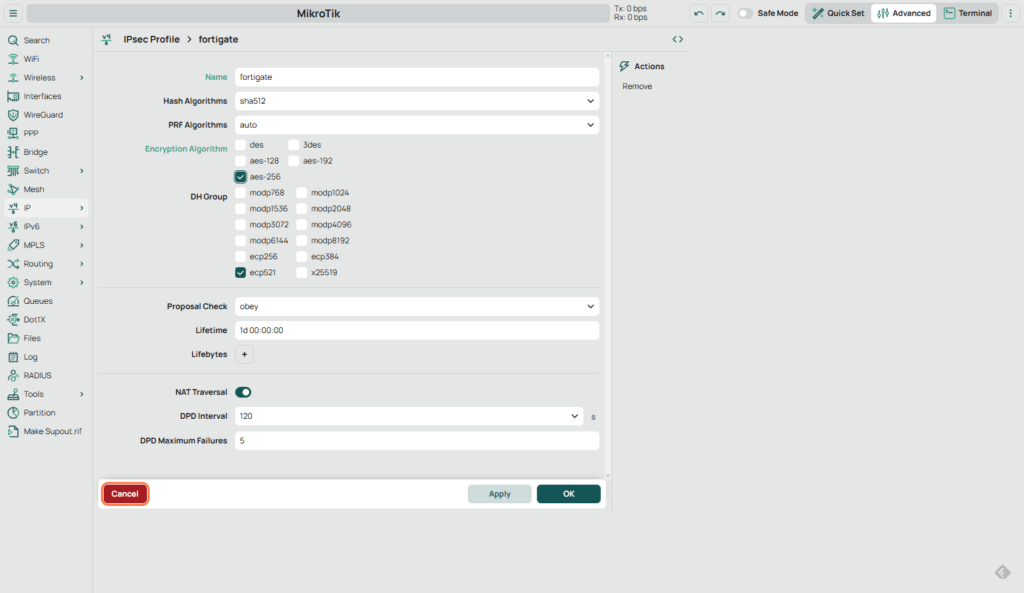
2.2 Create an IPsec Profile
- Go to IP > IPsec > Profiles. A Profile on Mikrotik roughly equates to IPSEC Phase 1
- Create a new profile called
fortigate:- Hash Algorithm: sha512 (Matching Phase 1 on Fortigate)
- Encrypt Algorithm: AES-256 (Matching Phase 1 on Fortigate)
- DH Group: ecp521 (This is where Mikrotik uses a bit of different terminology – more here)
- Disable 3DES if enabled
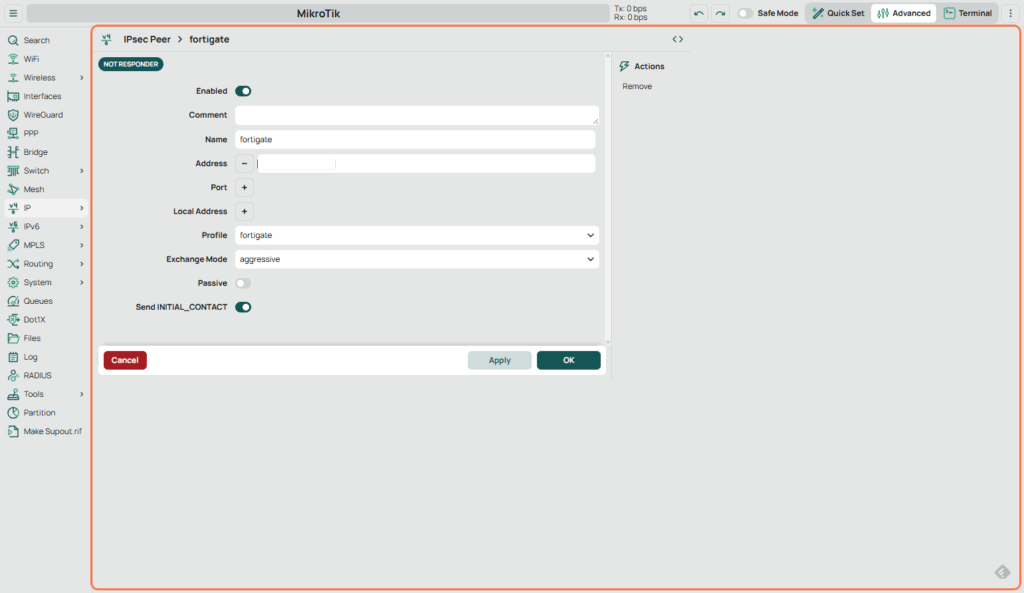
2.3 Configure the IPsec Peer
- Go to IPsec > Peers.
- Add a new peer:
- Address: FortiGate IP or DDNS name
- Profile: fortigate (Profile that was just created)
- Exchange Mode: Aggressive
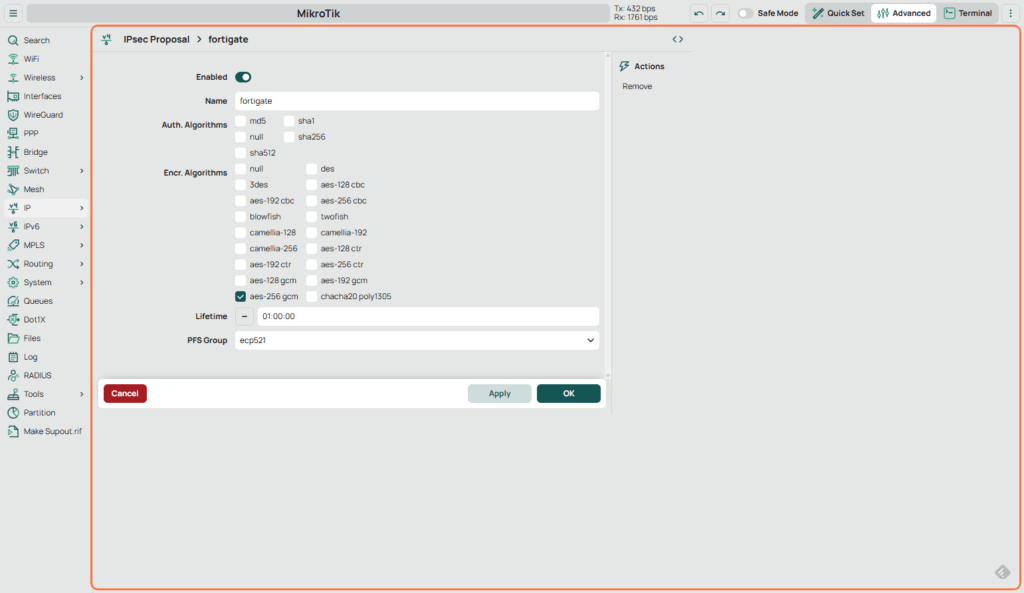
2.4 Configure Proposal
- Go to IPsec > Proposals. (This would be our Phase 2 Encryption)
- Edit or create a proposal with:
- Encrypt Algorithm: aes-256-gcm
- PFS Group: ecp521
2.5 Define the IPsec Policy
- Go to IPsec > Policies.
- Add a new policy:
- Peer: fortigate (Peer previously created)
- Tunnel: Yes
- Src. Address: 10.x.x.0/24
- Dst. Address: 172.x.x.0/24
- Action
- Action: Encrypt
- Proposal: fortigate (select matching one which was previously created)

Step 3: Testing and Verification
On FortiGate
diagnose vpn tunnel listCheck if the tunnel is up and matches the peer and selectors.
On MikroTik
/ip ipsec installed-sa printEnsure Phase 1 and 2 are both established.
Troubleshooting Tips
- Ensure the clocks are synchronized on both devices.
- Use Aggressive Mode if FortiGate is in dial-up configuration.
- Double-check matching encryption/auth settings on both ends.
- Make sure firewall rules allow VPN traffic.
Credit must be given to the following post:
What’s Next?
Now that your tunnel is up and stable, you can explore:
- Adding static or dynamic routing (BGP/OSPF)
- Using DDNS on MikroTik
- Monitoring VPN availability
- Scripting for multi-spoke deployment
Have questions or want to see the routing section next? Drop a comment below!
